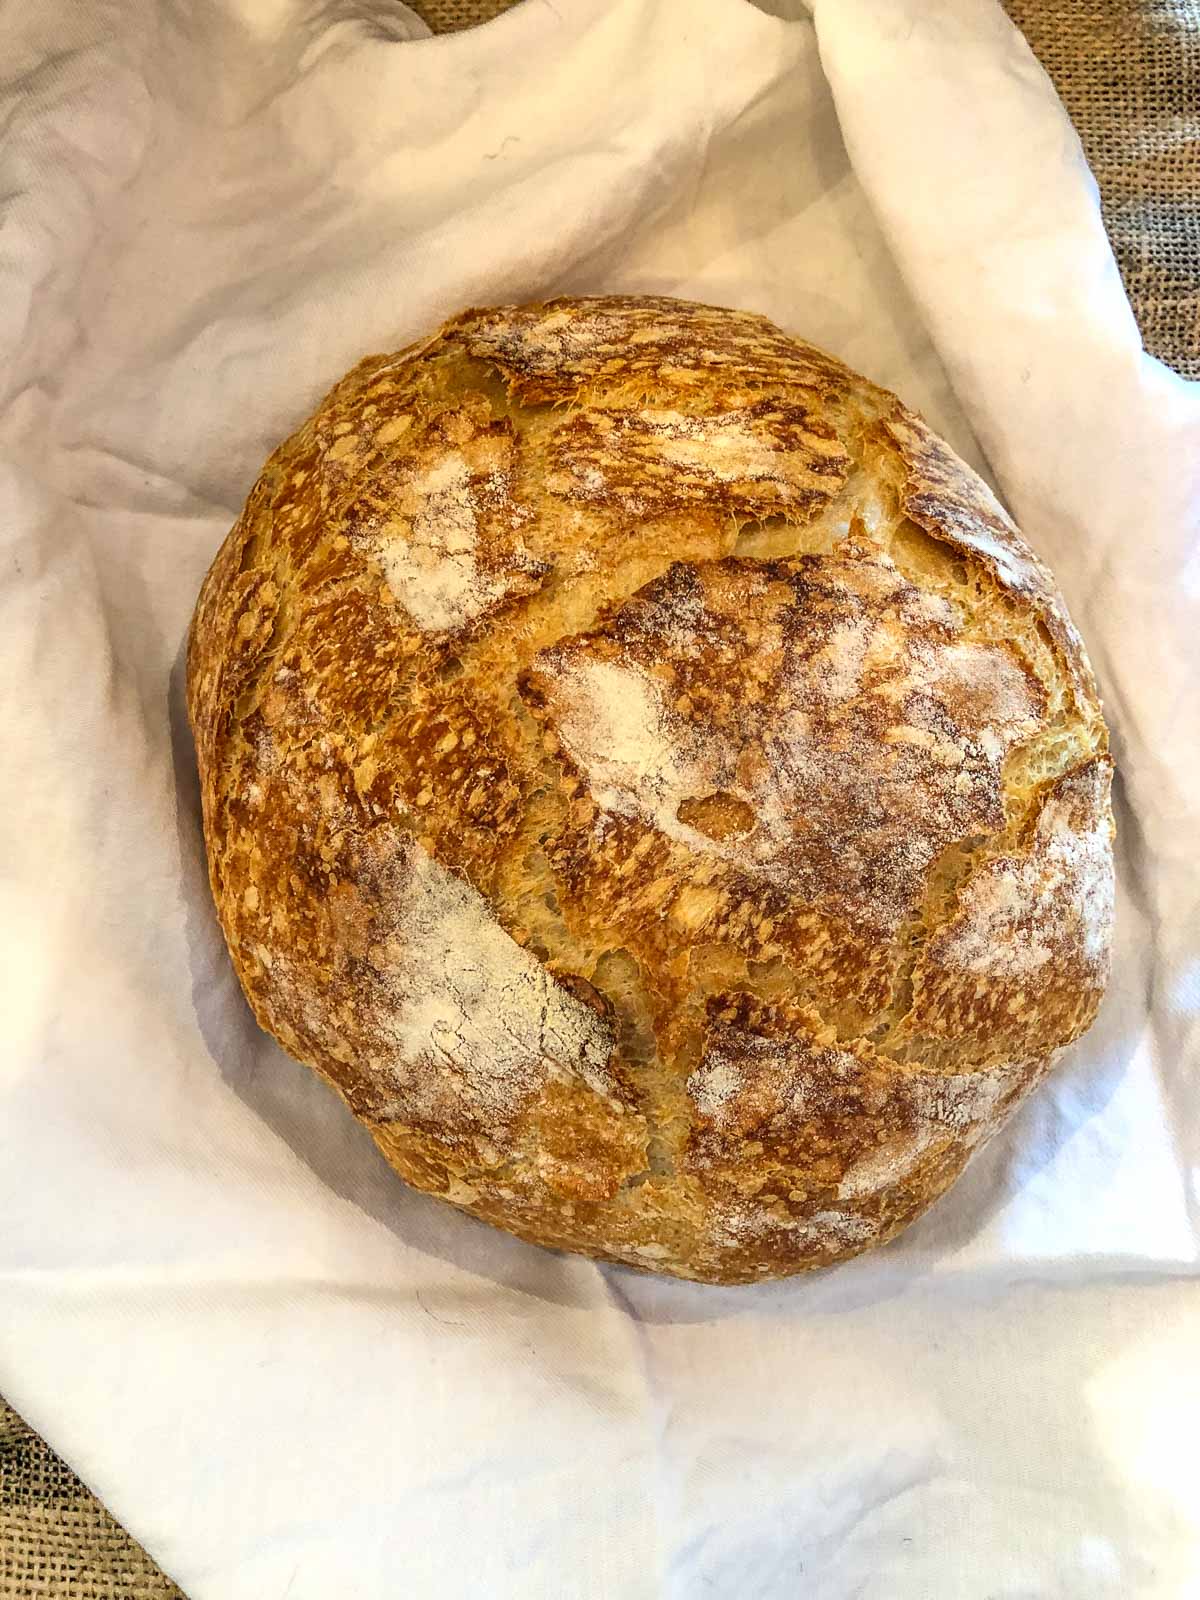
I followed a recipe for sourdough bread that turned out so amazing! Once the sourdough starter is ready for baking, you get this super crusty loaf of bread. For some reason, freshly baked bread never seems to last for long. Which is why it's good to have a starter on hand.
I told my friend and fellow chef, Baker Bettie that I wanted to make sourdough bread. I tried it years ago when living in San Francisco but it didn't work properly. She gave me her sourdough bread starter recipe and I went to work. According to my records, it took me 14 days for the sourdough starter to be ready for bread making. (Mostly because I forgot about it a day or two. Oops.)
Baker Bettie's recipe was pretty simple to follow. You just feed, feed, feed, feed, and feed. It's as easy as following a specific set of feedings for a few days, then you move on to another, then you move to the maintenance stage.
Key ingredient
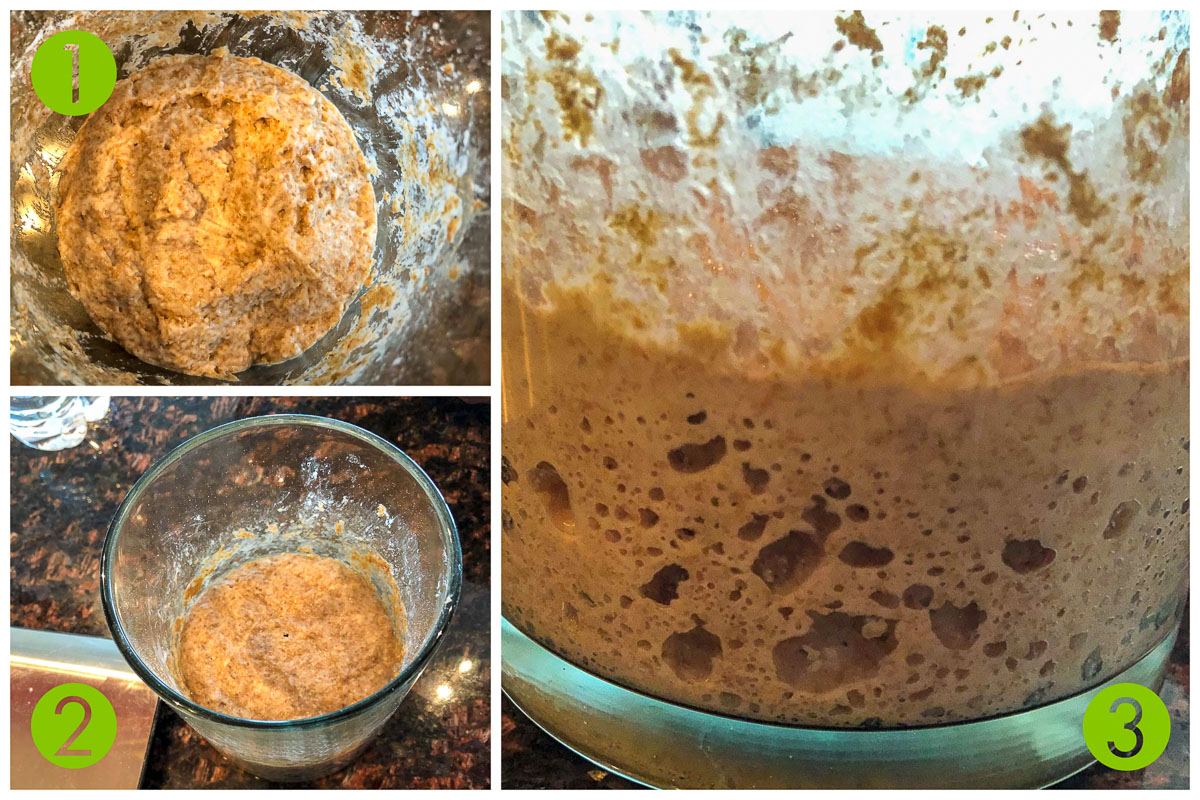
One key ingredient is the whole wheat flour. Whole wheat flour is less refined and has a better chance of creating the best living environment for wild yeast and (good) bacteria. You can catch the sourdough bread starter series that Baker Bettie has over on her YouTube channel. I've posted an image of the steps down to it's simplest form below.
I had a hard time remembering to feed my starter so I placed it on my calendar (on repeat) so I didn't forget. When I finished one stage of the sourdough recipe, I just updated my calendar for the next stage and so on.
All I needed was my scale, the flour, and I used a bottle of purified water. After the first day, I noticed that it started working, or fermenting, right away. It was pretty exciting. It reminded me of the time I made beer and watched all the activated yeast dancing around. In the case of making sourdough bread from a starter though, they don't dance as much as they bubble and expand. It's still pretty impressive when you realize it was a success and you're on your way.
Oh. I almost forgot the most important part. You have to name your sourdough starter, Baker Bettie's rules. I so aptly named mine Lazarus because well, TBH, this was my third time around making a starter. The first as I said was when I lived in San Francisco and I had no idea what I was doing. The second was a couple of months ago. I didn't set a reminder and so I forgot about it a few days and by the time I remembered, it was moldy.
As they say, third time's the charm. So, Lazarus lives!
Baking bread
After all the feeding and maintenance, I reached the point where my starter was ready for baking. Again, I used Baker Bettie's recipe for sourdough bread. The recipe itself is only a few ingredients but it describes what the process is like, why you do what you do for the bread to take shape. Since I followed her other recipe on sourdough starters, I skipped to the recipe part because my dough was ready for baking that day.
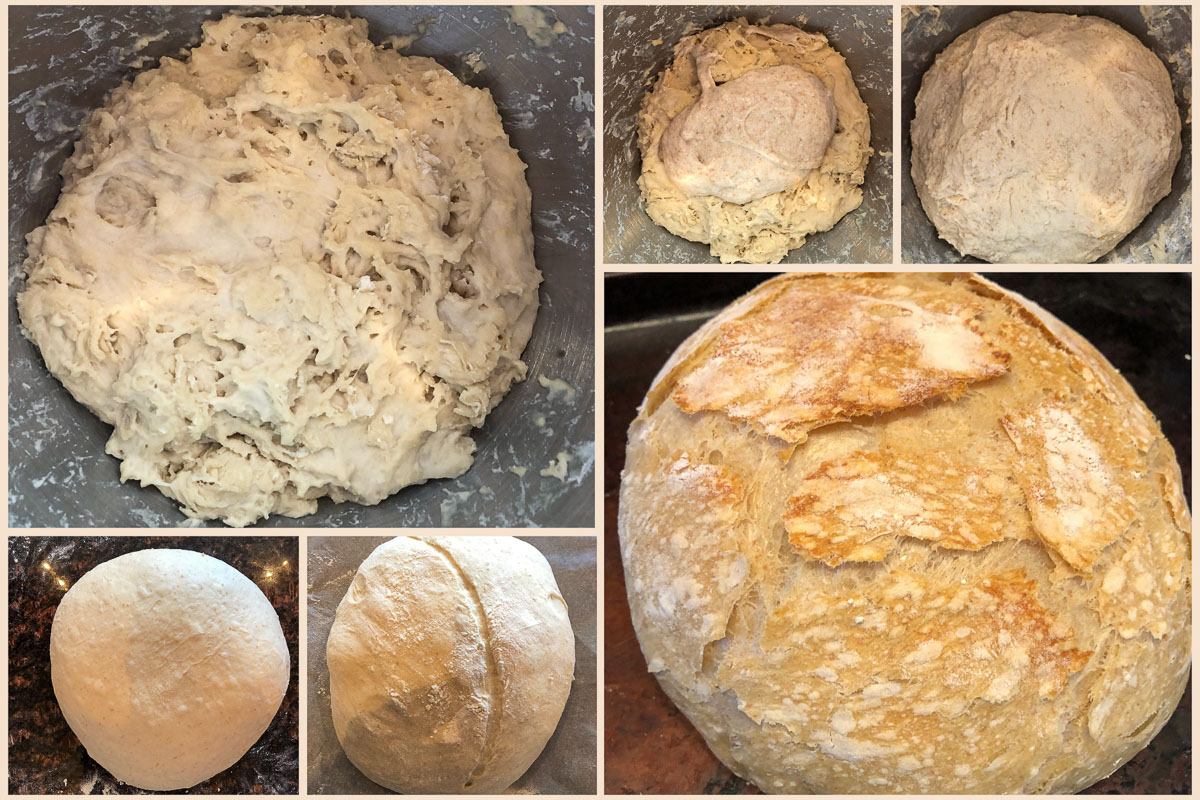
As you can see from the image above, you start with your all-purpose flour dough, then you add in your sourdough starter, mix it according to the instructions, then proof, stretching, shaping, proof, score, and bake. Remember, these are not the complete instructions for baking your sourdough bread, I'm paraphrasing. You should really follow a recipe precisely.
I didn't have a dutch oven so I used my stockpot. Once the initial baking was complete, I took the lid off and baked it further so it would have a deeper rich color. You can go as light or as dark as you want. Give it a good thump and that hollow sound means it is baked properly.
Let the bread cool for as long as you possibly can before cutting into it. I know it's tempting to want to eat it right away but if you cut into it before it is completely cooled, the inside will be gummy and not airy like bread should be. So, just wait!
What to do with leftover sourdough starter
Every day you feed your starter, you'll have some discard. In the beginning, you won't be able to use the discard for anything because the yeast and bacteria aren't really strong enough. Once you move into the maintenance stage, you have some options on how to use the product you would normally toss out.
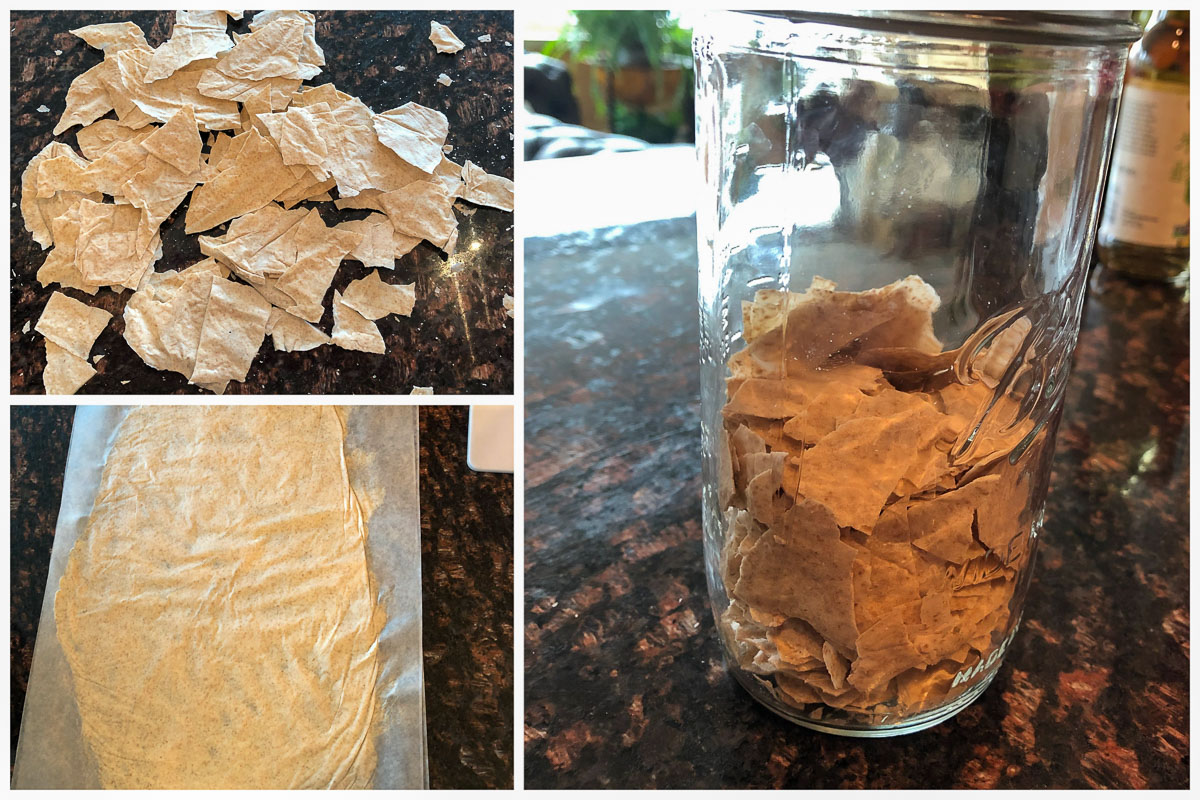
One of the options I chose was to dry out the discarded sourdough starter. I found a tip from King Arthur Flour's website on how to dry and store sourdough discard for later use. So, Lazarus will live on and on and on. When I make more sourdough, I will save the discard and he will become the new "mother" so to speak.
Let me know what you think about the recipe for sourdough bread by leaving a message below. Follow me on Facebook, Instagram, Pinterest, YouTube, and Twitter. Tag me with #joeeatsworld

Comments
No Comments